Category : Electronic

Electronic FT101E vintage tranceiver update

Yaesu FT101E VINTAGE TRANSCEIVER UPDATE Part one

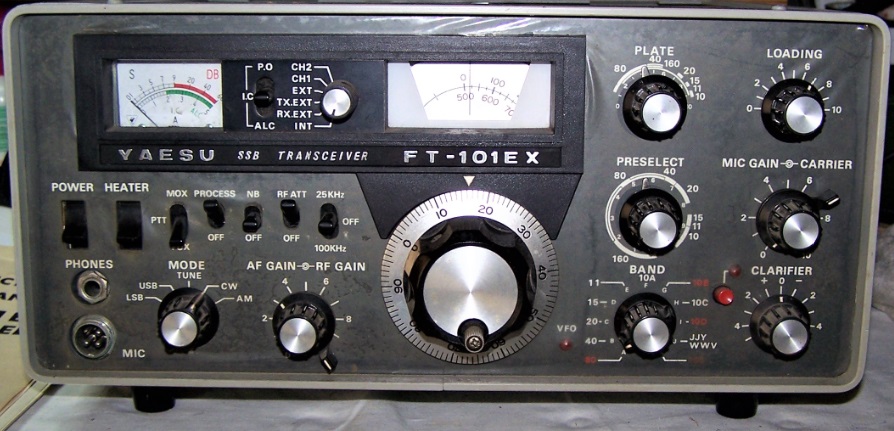
YAESU FT101E VINTAGE TRANSCEIVER UPDATE.

ft 101 e 1

Part one.

It was the workhorse of the Yaesu from 1970, year of start of production to the 80s. It seems to be the apparatus, in the various versions, more produced by Yaesu. I bought it in a duty free shop of Panama, Canal Zone, in 1974, in that time I was working, in those places. I paid it 500 US $ and the serial number is 5L 310554. More historic info about Yaesu FT101E in this link.

Read More
Electronic FT101E vintage tranceiver update

YAESU FT101E VINTAGE TRANSCEIVER UPDATE PART TWO

YAESU FT101E VINTAGE TRANSCEIVER UPDATE PART TWO

ft 101 e 1

It is assumed that the radio is in good condition and works perfectly, at least in reception mode, otherwise the installation of the filter does not make sense.

For this installation I helped myself, following the advice, of the instruction manual of the Yaesu FT101E which is available for reading and download here.

Read More
Electronic Heatkit SB 220 electronic update

Heathkit SB220 Power Amplifier Part one

I’m using a Heathkit SB220 since 1995. I bought it used. It has been built in 1980 by an Italian Amateur. This year I wanted to modernize it to keep it at a good level of performance.
Ho deciso di usare il kit RM-220 della Harbach Electronics. Il kit permette di sostituire completamente il sistema di retificazione e i circuiti di misura del PA.
I decided to use the RM-220 Harbach Electronics kit. It allows to sostitute the entire rectifier system and the meters circuits.

Read More
Electronic Heatkit SB 220 electronic update

Heathkit SB220 Power Amplifier Part two.

We continue the renovation of the Heathkit SB220 Power Amplifier.

Remove the 15 sheet metal screws that hold the perforated cover in place and remove this along with the top rear plate cover. Save the screws in a safe place. Be careful not to remove the screw that supports the insulating spacer that shorts to ground the positive high voltage, for safety reason, when the top cover is removed. The photo shows the small isolating spacer tied up the cover.

100_3203
Read More
Electronic Heatkit SB 220 electronic update

Heathkit SB220 power amplifier part three

.We can disassemble the old rectifier circuit board. Remove the four screws holding the old rectifier circuit board to the tapped spacers on the capacitor bank bracket. Put the four screws in a safe place. Unsolder old wires from the boad. It don’t require remember the positions. The wires’s colors will help us reconnect them on the new circuit board.

100_3216
100_3221
Read More